Building a USN Mark V Helmet - DESCO Style
 Diving Helmet Parts
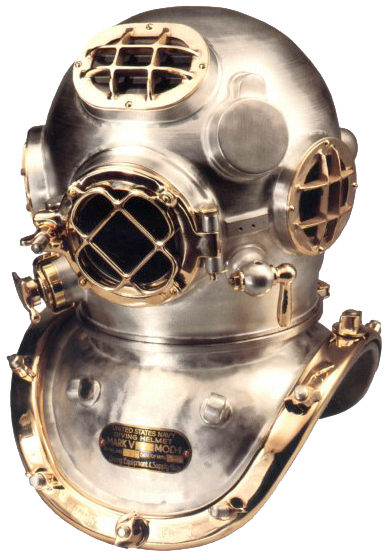
You can't build anything without the correct parts. An example is the U.S. Navy Mark V Helmet has 159 parts. Some parts we purchase "off the shelf", some we subcontract, and some we make in house. DESCO diving helmets (Mark V, Helium, Commercial, or Air Hat) are made up of various parts from many sources. Heavy and massive parts are generally cast from Red Brass by a local foundry. Lighter more detailed or precision parts are made on our machines by us, or sub-contractors with equipment which can make them more efficiently. Standard hardware (wiring, speakers, nuts & bolts, etc.) are purchased from industrial supply houses. Stock materials such as Acrylic for the windows, Yellow Brass for turned parts, rubber and leather for gaskets are all sourced locally. Every part on a helmet has some value added labor done to it before it is installed. Below is a list of the parts in a Navy Mark V helmet.
US NAVY MARK V DIVING HELMET DESCO CORP. P/N 29103
Diving Helmet Assembly
BONNET
22036 HELMET SHELL 21135 NECK RING (FEMALE) 21116-A FRONT DOOR BASE 21117 FRONT DOOR
21118 FRONT WINDOW RETAINING RING 27042 FRONT DOOR LIGHT 21119 FRONT DOOR GUARD
23138 FRONT DOOR TOGGLE BOLT 23030 FRONT DOOR TOGGLE BOLT WASHER
23029 FRONT DOOR TOGGLE BOLT HINGE PIN 21120 FRONT DOOR WING NUT 23028 FRONT DOOR HINGE PIN
27064 HINGE PIN COTTER PIN 26009 FRONT DOOR GASKET 21115 SIDE WINDOW BASE
21114 SIDE WINDOW GUARD 27041 SIDE WINDOW LIGHT 21121 TOP WINDOW BASE 21122 TOP WINDOW GUARD
27041 TOP WINDOW LIGHT 24027 WINDOW GUARD SCREWS (16) 21162 WELDING LENS BRACKET
27058 3/16" x 1/2" COPPER RIVETS (6) 21147 AIR INLET ELBOW 21059 AIR / COMM ELBOW WASHER (2)
21146 COMMUNICATIONS ELBOW 23122 COMMUNICATIONS ELBOW BUSHING
23121 COMMUNICATIONS ELBOW GLAND RING 23120 COMMUNICATIONS ELBOW GLAND NUT
21150 TELEPHONE CUP 24028 TRANSCEIVER STUDS (2) 22037 TRANSCEIVER STUD SPACER
24029 TRANSCEIVER STUD NUTS (4) 21270 TRANSCEIVER BRACKET 21271 TRANSCEIVER
22038 TELEPHONE WIRE TABS (3) 21272 24" 2 WIRE COMM CABLE 23301 SLEEVE 23302 SPACER
23303 WASHER 23304 PLUG GUIDE 23310 6-32 x 1 ¼” FHMS BRASS (2) 23305 CONTACT HOLDER
23306 CONTACT HOUSING (2) 23307 CONTACT SPRING (2) 23308 CONTACT COVER (2) 23309 CONTACT SPACER
21128 EXHAUST BODY (BANANA) 21129 EXHAUST BODY WASHER 23084 BONNET 21184 HANDLE 22039 YOKE 27092 PRIMARY SPRING 27091 SECONDARY SPRING 23085 BEARING PIECE 23086 SPRING RETAINER
23081 EXHAUST VALVE STEM 23082 ADJUSTING SLEEVE 23083 LOCK SCREW 23080 CHIN BUTTON
24028 YOKE SCREWS (2) 22030 AIR DUCT, INLET 22028 AIR DUCT, FRONT 22029 AIR DUCT, LEFT
22027 AIR DUCT, RIGHT 21124 SPITCOCK BODY 21125 SPITCOCK BODY WASHER 21123 SPITCOCK STEM
21126 SPITCOCK STEM WASHER 24015 SPITCOCK STEM NUT 21161 BALL LEVER 21139 PIVOT
23058 PIVOT PIN 23032 WASHER 23059 AIR CLOSE CAP 27056 AIR CLOSE CAP WASHER
21101 COMM CLOSE CAP 27057 COMM CLOSE CAP WASHER
BREASTPLATE
22017 SHELL 21130 BOTTOM COLLAR STRAP 27080 WIRE BEAD 21136 NECK RING (MALE)
21149 BREASTPLATE LOOP (2) 21125A LOOP WASHER (2) 23033 SHORT STUDS (11)
23034 LONG STUD 21142 BRAIL LEFT FRONT 21143 BRAIL RIGHT FRONT
21144 BRAIL RIGHT REAR 21141 BRAIL LEFT REAR 21127 WINGNUT (8) 21134 FLANGED WINGNUT (4)
22033 BREASTPLATE STUD WASHER (4) 23137 LOCKSTOP 22024 LATCH 23124 LATCH PIVOT PIN
27055 LOCK PIN 29022 CHAIN 27053 CHAIN LOOP 27061 NAMEPLATE 27052 1/8" COPPER RIVETS (2)
27025 NECK RING GASKET
NON-RETURN VALVE
23060 NON-RETURN BODY 23064 CHECK VALVE 59523 O-RING (CHECK VALVE)
23077 RETAINING PLUG 27059 LEATHER GASKET
NOTE: The Non-Return Valve parts were not included in the 159 parts count for the Mark V Helmet. The helmet could be used without a Non-Return Valve, but it would be dangerous to do so. A Non-return Valve is standard equipment on our helmets.
Our parts are produced in either of two ways. The part can be cast in Brass using molds and sand casting. This process is used mostly for odd shaped parts. Parts which have regular shapes are cut from bar stock.
Cast parts are made from DESCO's patterns. The foundry places forms over the patterns and rams sand until it takes the shape of the pattern. In areas of the final casting that need to be hollow, cores made of fine sand are inserted. Molten Brass is poured into the mold to produce the parts.
We received Red Brass castings from the foundry. The parts included breastplate base rings, neckring sets, window bases & guards, breastplate loops, and telephone cups. The cast parts require some machining. They also must be sanded and buffed.
As usable parts are received or castings are machined to a usable state the parts will be stored in our parts racks until needed.
Diving Helmet Fabricating, Machining & Finishing Parts
The helmet shells are spun by an outside supplier who specializes in metal forming. During World War Two the shells were spun in house.
The bonnet needs to have all the openings cut for the windows, telephone cup, spitcock, and elbows. Hole locations are laid out with a pattern. Cutting is done with hole saws of the correct size in a drill press.
Whether cast or brass stock the parts require machining. This could entail drilling and tapping holes, single pointing threads, cutting to size, or just making a clean surface.
Turned parts are machined from round, square, or hex Yellow Brass bar stock. These parts include breastplate studs, front door toggle bolt, canister nuts, canister sleeves, exhaust stem, exhaust bonnet, and Non-return parts.
Casting need to be machined too.
Some parts which are too large for our equipment or have special requirements are sent out for machining by a subcontractor.
Many of the machined parts still need sanding and buffing. The window frames, exhaust body, elbows, and spitcock all need to be sanded and buffed before installation. Other parts which will not be plated require further polishing. Some parts like the brails and telephone cup don't need any machining done so it is just sanding and buff/polish for them. Sanding is done on a belt sander for flat surfaces, or a sanding disk mounted in a drill press. Buffing is done with cloth hard or soft wheels on a pedestal grinder. The hard wheels have grit of different grade glued to them, while the soft wheels use a greaseless compound. High polishing is done with jeweler's rouge on a soft wheel. The bonnet shells sometimes need to be sanded a bit to seat properly in the neck ring. The bonnet lip is sanded on the hard wheel like the cast parts.
After each piece has been prepared it is ready to be assembled on the bonnet shell or breastplate.
Diving Helmet Assembly
The shell is media blasted to clean the metal and facilitate soldering. At this point it is ready to receive the other parts of the top.
The neck ring is soldered in first. The index mark on the neckring must align with the center of the door opening.
Next the window frames are set and soldered to the shell, starting with the door frame.
The exhaust body, telephone cup, spitcock, and air & communication elbows, welding lens bracket, and lock dumbbell are then added.
After media blasting and some cleanup it is ready to be plated or polished.
The Breastplate has fewer parts but is no easier to make.
The breastplate shell is made from a single sheet of Copper. It is clamped into a female mandrel. Heat is applied to anneal the Copper and make it pliable. A wood mallet is used to form the Copper to the mandrel. The neck opening is marked and cut out with a chisel. When the shell is cool some light finishing is done. Small dents and ripples can be felt in the metal and they are peened out before the shell is removed.
The shell is transferred to the male mandrel. The bottom collar strap is clamped on top of the shell. The Copper is trimmed and the edge is peened over the collar strap.
Now the assembly goes to soldering. The solder is sweat through between the shell and collar strap.
The breastplate neck opening is trimmed and filed flat. The lower (male) neckring is soldered on making sure that the index mark is aligned with the center. Before the neckring is installed the lockstop is silver soldered to it.
The holes for the breastplate studs are laid out and drilled. A recess cutting tool is used on the inside of the breastplate to inset the heads of the studs. The breastplate receives 11 short studs, and a long (bastard) stud which provides a hanging point for the air control valve. The long stud is on the left of the front center stud from the diver's perspective.
A wire bead is soldered onto the collar strap which helps seal the rubber suit collar to the breastplate.
After some cleanup of the solder joints it is ready to be plated or polished.
Once the helmet comes back from plating or the polishing is finished final assembly can begin.
The top and breastplate are put together to make sure they will screw together smoothly. Sometimes excess tin plating will interfere. When that occurs the threads are lapped with lapping compound until they work smoothly.
Once the threads are clean the leather neck ring gasket is fitted. Since cow hides vary in thickness each gasket must be "scraped" down to the needed thickness. The top is screwed down on the breastplate and the position of the index marks are noted. The gasket is also checked to see there is uniform contact all the way around. High spots will be shiny and low spots will not have any marking. Scraping continues until the index marks will line up without having to use much force. On display helmets the gasket will be cut down a little more to aid in assembly, as a watertight seal is not necessary.
The door toggle bolt is now installed. The retaining washer is peened onto the toggle bolt so the wingnut can't be removed.
The exhaust valve stem is lapped into the body seat to give a good fit. The exhaust assembly of bonnet, starwheel, primary and secondary spring, bearing piece, and spring retainer are installed.
The spitcock stem is lapped into the valve body. The washer and nut are installed and the threaded end is peened to stop the nut from unscrewing.
The windows are made of Acrylic plastic. This material is easier to work with and safer that the glass windows in the old helmets. Early diving helmet windows were made from laminating two pieces of glass together to get the correct thickness. Each window is beveled to match the bevel in the window frames. The windows are glazed in with a Litharge and Glycerin compound. Old helmets used red lead which had a higher Lead content.
Communications are installed. The contact assembly is assembled and the wire is attached. The contact assembly is placed in the communications elbow and the packing and packing nut are installed on the inside. Melted bees wax is poured into the communications elbow to fully seal it. The insulator and cover are installed after the excess wax is removed. The communications cap receives a leather gasket and is installed.
The Non-Return Valve is assembled and installed.
The door gets a rubber gasket. It is held in place by a hinge pin. The hinge pin receives a 1/16" cotter pin to prevent it falling out.
Attention shifts to the breastplate. The brails are fitted in their correct locations. Some filing of the holes and bending may be necessary for a proper fit. Once fitted they are sanded and polished. The final step for the brails is being stamped "front" or 'back".
The lock latch is installed in the lockstop with a Brass rivet, which acts as the pivot pin. A cotter pin specially machined for this application is installed on a chain to hold the latch closed. The chain and pin are attached to the lockstop via a ring.
Four Copper washers are installed on the front, shoulder, and back studs. These washers span the gap between the brails and prevent them pinching the dress collar.
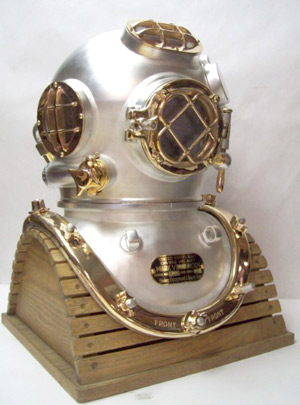 The nametag is riveted to the front of the breastplate with two Copper rivets. The backside of the rivets are soldered to make them watertight.
The brails are installed and the wingnuts are put in place to finish the assembly process.
The helmet will be placed in two boxes for shipment, bonnet and breastplate separated. Shipping the helmet assembled runs the risk of the breastplate being crushed by the weight of the bonnet during transport. If a helmet can be separated we strongly urge that it never be shipped or transported assembled. If it is we will be happy to repair it. We can always use the work.




 0 Item(s)

